This Christmas, Matt's sister and brother-in-law gifted us a fantastic Chicago Cutlery knife set. (It was on our wedding registry, which is even cooler if you ask me.) We'd been working with two hand-me-down knife sets that we'd each had since getting our first apartments in college, so...seven or eight years now? Crap. We're old. Anyway, I was so excited at the prospect of finally working with some stellar knives that I looked up a meal that involved a ton of chopping, slicing and cutting so as to test out as many of the knives in one go as I could. I was not disappointed with the balsamic-glazed steak kebabs and orzo "risotto", both in terms of taste and knife-using-requirements. We even busted out the steak knives, despite the fact that the kebab pieces were small and tender enough to do without. It was just too much fun!
 Sometimes I post full recipes here, but this time I'm just going to link them. Mainly because I followed the recipes to a T and didn't really improvise or adapt them at all. I like to follow recipes exactly the first time or two I make them, then tweak as needed if the dish makes it into our regular rotation. I highly recommend both the balsamic-glazed steak kebabs and the orzo "risotto". The orzo came out a bit thicker (and honestly, more risotto-esque) than the picture on the original site, but it was delicious nonetheless. For the green beans, I just threw them in the steamer and set it over simmering water for, I dunno, five minutes? Seven? I like my cooked veggies crunchy, so adjust the cooking time to your preferences. I then just tossed them with a little butter and salt. When you have that many other flavors going on, you need one side to stay semi-simple.
I promise at some point I'll do a post on all the cool photography gear I received/bought this Christmas season. Right now I'm swamped with photo shoots that have allowed me to use said gear, a couple freelance writing deadlines for the bridal magazine, and of course eight billion wedding crafts. I decided to save all the wedding craft posts for after the wedding, partly to help keep an element of surprise for readers who also are attending the big event (hi, Aunt Kathleen!) and partly because I feel like I barely have enough time (less than four months!!) to do the crafts themselves, let alone the photographing/writing that's needed to do posts on them. But just so you have an idea of what to expect: There will be fabric flowers! Wine-bottle vases! A birdcage veil! Pocket invitations! Probably some other stuff that I'm forgetting at the moment! DIY brides for the win, amiright?
Sometimes I post full recipes here, but this time I'm just going to link them. Mainly because I followed the recipes to a T and didn't really improvise or adapt them at all. I like to follow recipes exactly the first time or two I make them, then tweak as needed if the dish makes it into our regular rotation. I highly recommend both the balsamic-glazed steak kebabs and the orzo "risotto". The orzo came out a bit thicker (and honestly, more risotto-esque) than the picture on the original site, but it was delicious nonetheless. For the green beans, I just threw them in the steamer and set it over simmering water for, I dunno, five minutes? Seven? I like my cooked veggies crunchy, so adjust the cooking time to your preferences. I then just tossed them with a little butter and salt. When you have that many other flavors going on, you need one side to stay semi-simple.
I promise at some point I'll do a post on all the cool photography gear I received/bought this Christmas season. Right now I'm swamped with photo shoots that have allowed me to use said gear, a couple freelance writing deadlines for the bridal magazine, and of course eight billion wedding crafts. I decided to save all the wedding craft posts for after the wedding, partly to help keep an element of surprise for readers who also are attending the big event (hi, Aunt Kathleen!) and partly because I feel like I barely have enough time (less than four months!!) to do the crafts themselves, let alone the photographing/writing that's needed to do posts on them. But just so you have an idea of what to expect: There will be fabric flowers! Wine-bottle vases! A birdcage veil! Pocket invitations! Probably some other stuff that I'm forgetting at the moment! DIY brides for the win, amiright?
Howdy folks! Taking a quick break from editing my friends' engagement photos to post a little DIY featuring our engagement photos! I knew I wanted to do a magnet save the date, both for the convenience of the recipients and frankly because it's just kinda cool. But when I researched prices from places like VistaPrint, it was just more than I wanted to pay. So when I found this tutorial for DIY save-the-date magnets, I was sold.
I have InDesign, so I figured doing the magnet layout wouldn't be too hard. I was wrong, or more accurately, I severely underestimated my perfectionism; it took me something like two weeks to design the dang thing. But once I finally settled on my fonts, graphics, photos and overall layout, I was ready to go.
I found a nice paper cutter and some 8.5-by-11-inch sheets of magnet with adhesive backing on Amazon, and found a nice semi-matte paper at Staples. I decided to print on 11 by 17 paper; fewer sheets meant more cutting but a lower cost. So once the sheets were printed, I had this:
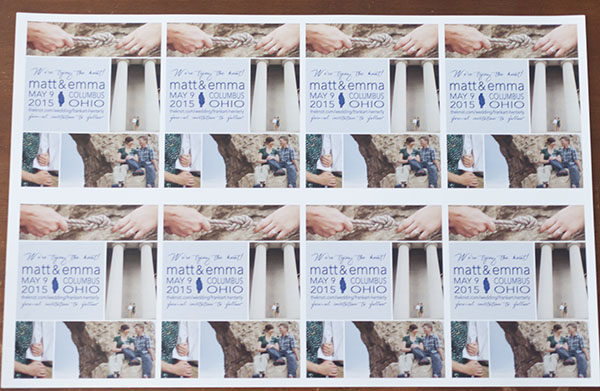 Then I just had to cut them in half, so each 11 by 17 sheet became two 8.5 by 11 sheets:
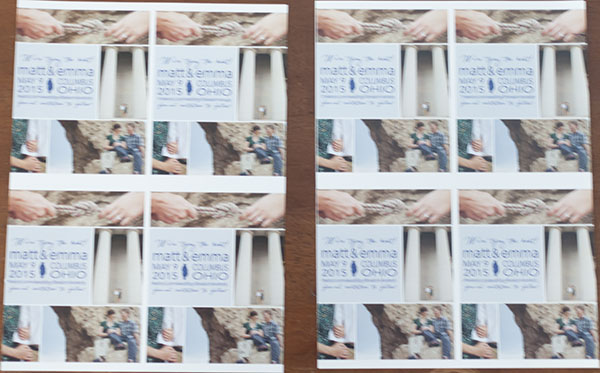 Then I peeled the backing off of a magnet sheet and very carefully laid the sheet of save-the-dates on the adhesive side:
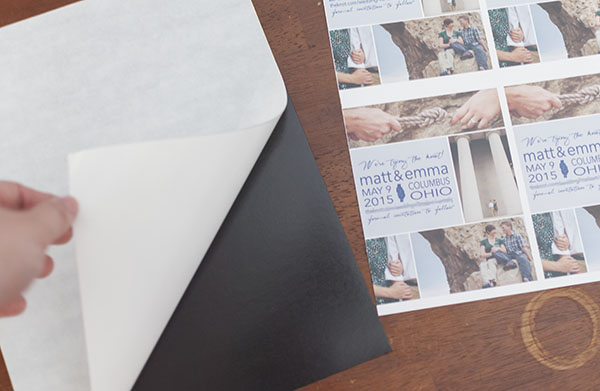
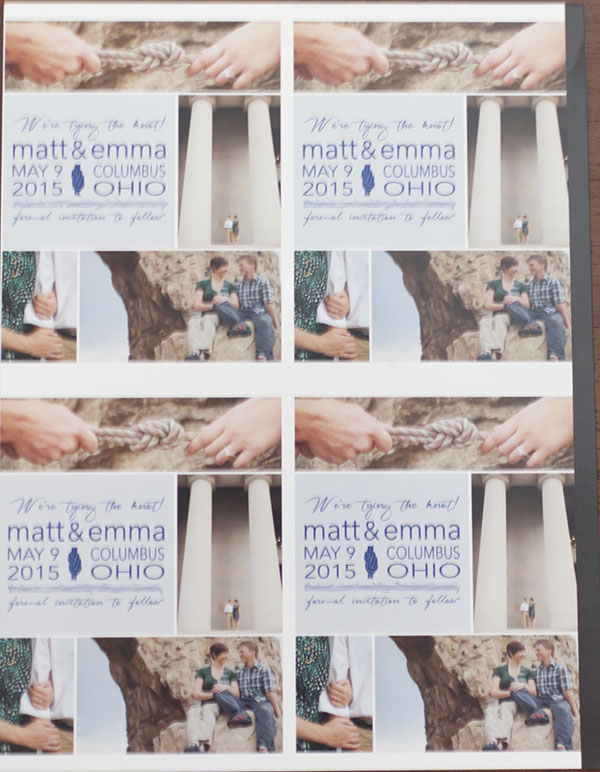 That actually took a bit of trial and error, but luckily I thought to have extras, so ultimately there was no lost. Then, it was just a matter of cutting out the individual save-the-dates:
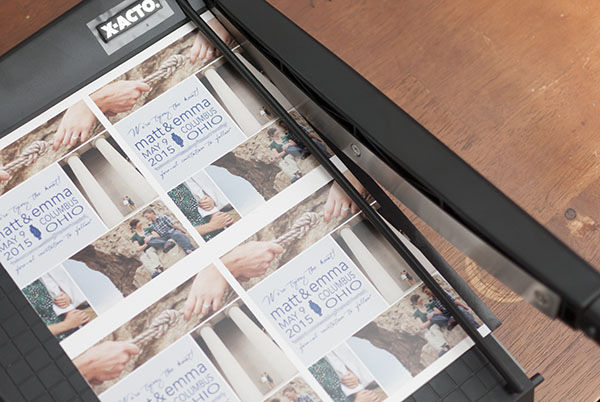
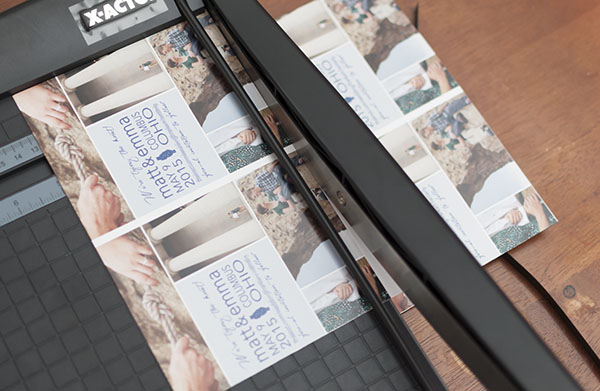
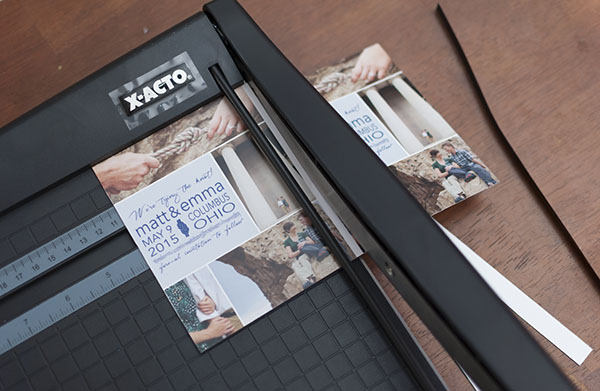 Ta-da!
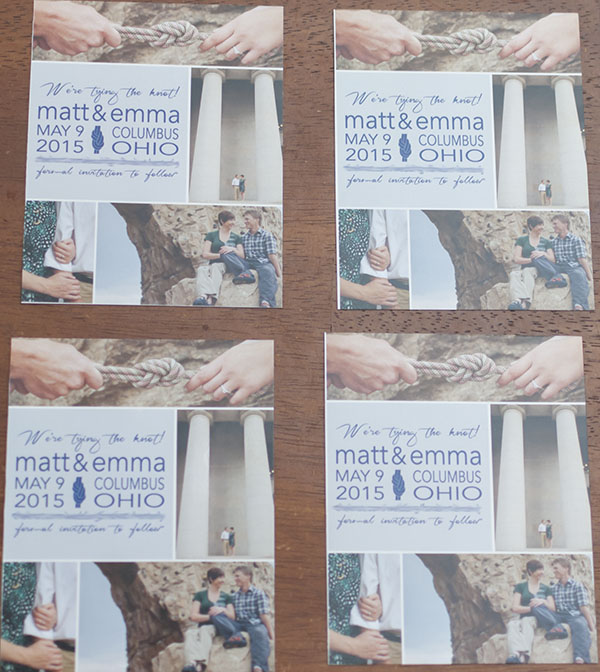 This wasn't quite the end, though. The paper cutter was nice, but it wasn't exact. And to be honest, I was kind of hurrying to get them all done. So I tended to wind up with some imperfect edges:
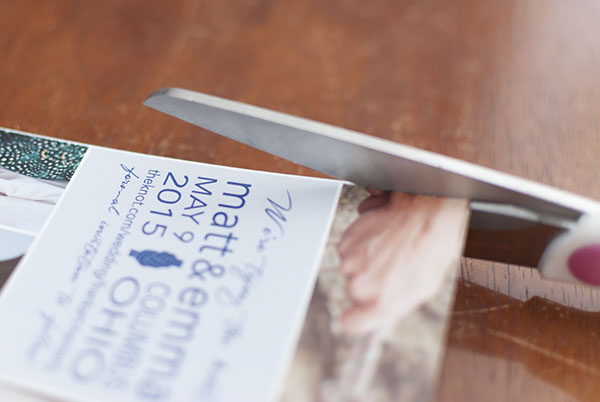
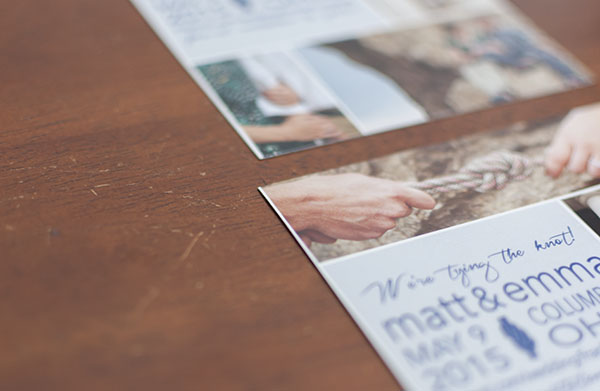 Soooo I just trimmed them by hand with scissors:
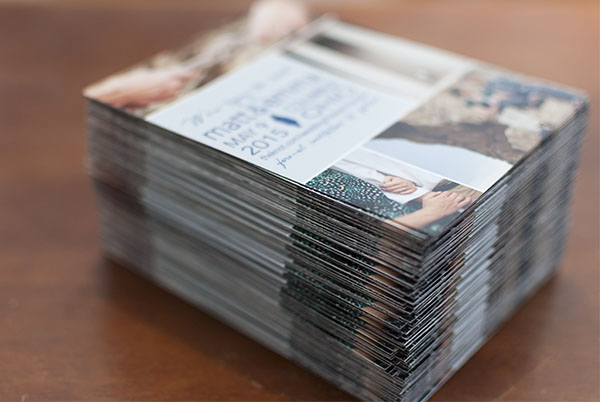
 And here they are! Just over 100 save-the-date magnets, all done in an afternoon!
 If anyone's wondering, I went with a "tying the knot" theme because Matt and I climb; that's our first climbing rope in the top photo. The shot on the side, with the two big columns, is the Ohio Statehouse — where he proposed :) And the shot in the bottom-right is us at the Scioto Audubon Metro Park, which has the nicest faux-rock wall I've ever seen. Bonus: It's outside, and it's free to use! Oh and I apologize for the blurred line, but I didn't feel like advertising our wedding website — with details on the time and location of everything — in a public forum. #sorrynotsorry
Anyway, there you have it. Easy-peasy save-the-date magnets!
If anyone's wondering, I went with a "tying the knot" theme because Matt and I climb; that's our first climbing rope in the top photo. The shot on the side, with the two big columns, is the Ohio Statehouse — where he proposed :) And the shot in the bottom-right is us at the Scioto Audubon Metro Park, which has the nicest faux-rock wall I've ever seen. Bonus: It's outside, and it's free to use! Oh and I apologize for the blurred line, but I didn't feel like advertising our wedding website — with details on the time and location of everything — in a public forum. #sorrynotsorry
Anyway, there you have it. Easy-peasy save-the-date magnets!
Ahh, yeah, sorry about my radio silence these past few days. Happy Thanksgiving! It was a crazy-busy, extra-long weekend and I'm not even going to bore you with the details. Instead, I submit to you this vanilla-cinnamon-apple bourbon I infused. And oh wow. You guys, oh WOW.
So this was a bit of a trial-and error thing. I Googled a bunch of recipes to get ideas about proportions, which I promptly ignored. It wasn't the best result. Fortunately, I had enough to make two batches: a one-week infusion and a two-week infusion. I was able to correct my mistake in the longer version and hot dang, is it tasty.
I started with a 750 mL bottle of Woodford Reserve. You can use any kind of bourbon you like, but this is what was recommended to me by the bartender who inspired me to try my own hand at infusing. I also picked up a couple of green apples, a jar of vanilla beans (which fortunately contained two beans), a jar of cinnamon sticks, and two quart-size mason jars. The nutmeg I had on hand, but has since mysteriously disappeared from my house...
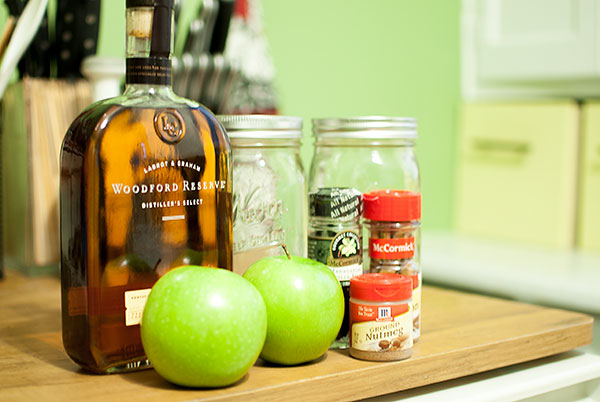 Anyway, I just split the bourbon into the two jars.
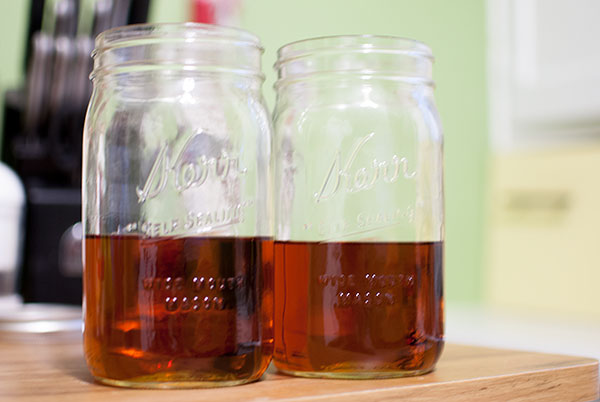 Then I sliced the apples and added one to each jar. I went back and added another half-apple to each jar, which was actually a mistake as it turns out. In fact, I would suggest doing one-half or three-quarters of an apple per jar, or using Golden Delicious apples instead. The Granny Smiths were just too tart.
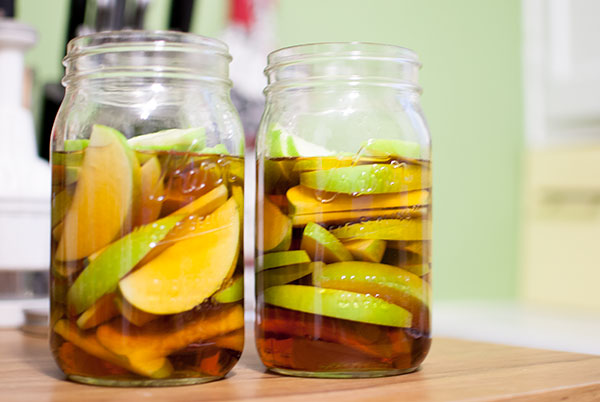 Anyway, I also divided the cinnamon sticks between the two batches and added them with a dash of nutmeg to each jar as well. I think I ended up with three or four cinnamon sticks in each batch.
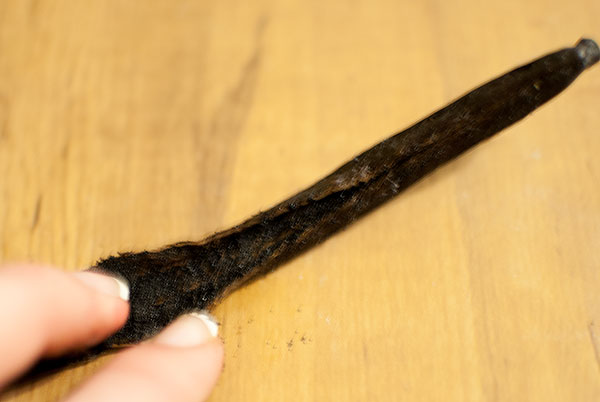
 Next up was the vanilla. Real vanilla beans are interesting things, and to get the full flavor you have to split them down the center with a sharp knife to open them up. You don't want to cut all the way through; just enough to get the "tube" of the bean open. Inside are all these tiny, wonderful-smelling grains of vanilla-ness. It was kind of hard to photograph, but here's my attemp.
 Then I just popped one bean into each jar. I had to kind of fold them in half so they'd fit well.
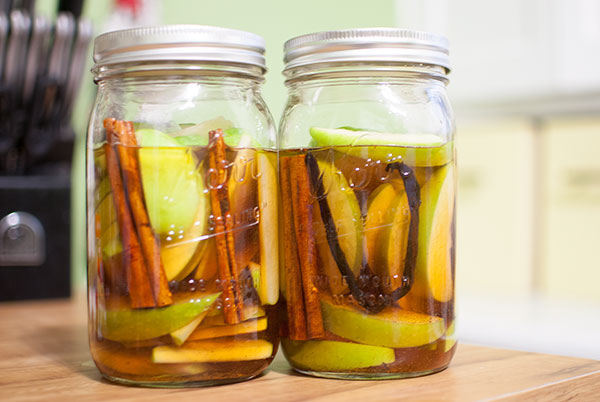 Then I gave each jar a good shake, labeled them with the date and the duration for infusing, and left them in a cool, dark space on my counter where they wouldn't be disturbed.
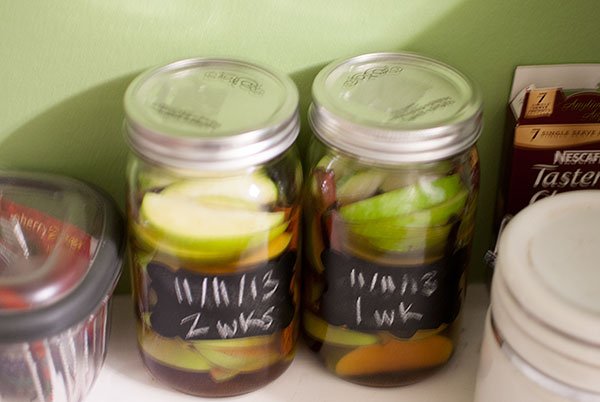 When the time came, I gave the jar a good hard shake to mix everything up again. Then I took a fine-mesh strainer and poured the jar through it into a different container. I gave the jar a good rinse to get rid of any loose particles, then poured the newly infused bourbon back into it.
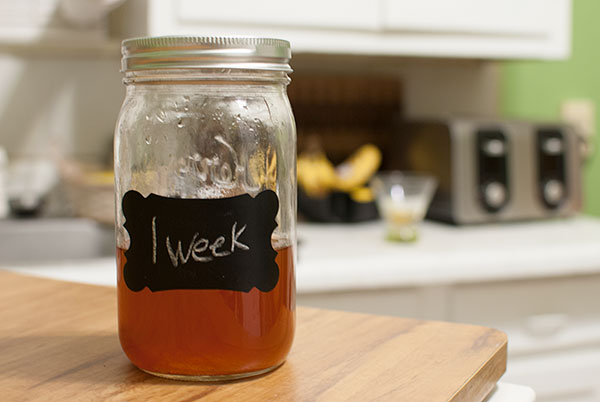 On tasting the first batch, I realized it was wayyyyy too tart. So I took about half the apples out of the second batch, which still had a week to go. It turned out perfectly. As for the first batch, I'm thinking about adding some pure vanilla extract to it to tone down the tartness a bit. Sydney also suggested adding maple syrup, which may be the most Canadian thing I've ever seen. (Except perhaps my six-pack of fleece-lined leggings.) I might split the jar and try a little in each to extend the experiment.
Despite the minor setback of the tartness, I'd call this foray into liquor infusions a great success. Have you ever tried infusing booze? Tell us about it (and link to a recipe, if you can!) in the comments :)
On tasting the first batch, I realized it was wayyyyy too tart. So I took about half the apples out of the second batch, which still had a week to go. It turned out perfectly. As for the first batch, I'm thinking about adding some pure vanilla extract to it to tone down the tartness a bit. Sydney also suggested adding maple syrup, which may be the most Canadian thing I've ever seen. (Except perhaps my six-pack of fleece-lined leggings.) I might split the jar and try a little in each to extend the experiment.
Despite the minor setback of the tartness, I'd call this foray into liquor infusions a great success. Have you ever tried infusing booze? Tell us about it (and link to a recipe, if you can!) in the comments :)
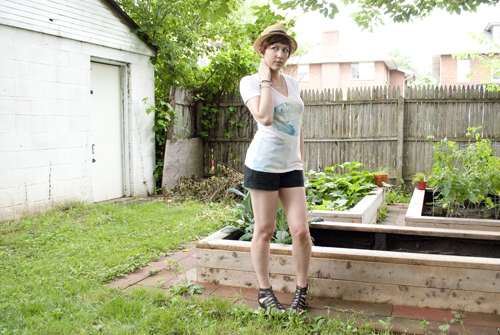
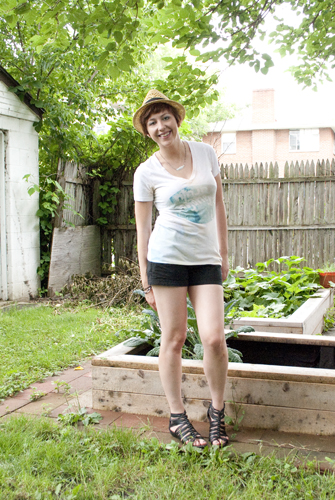
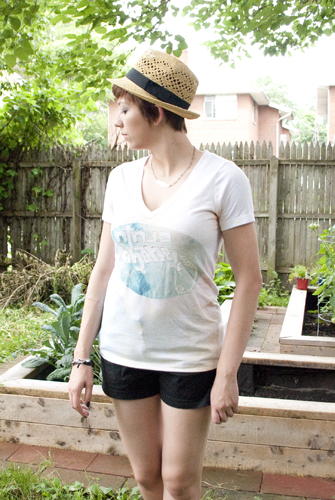
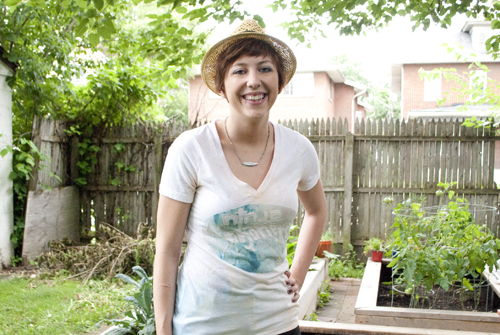
t-shirt: DIYed
shorts: thrifted
fedora: H&M
sandals, bracelets: Target
necklace: Etsy
Mornings are so hit-or-miss for me. Yesterday I hopped out of bed the first time my alarm went off, jumped in the shower, did a little yoga, got ready, made coffee, wrote a blog post, packed a lunch and practically skipped out the door.
This morning, not so much.
No, this morning I hit the snooze. I have a bit of a lingering migraine, so I skipped yoga. (Really bad headache + downward dog = more pain.) I slogged through getting ready and practically took a nap on the floor of my closet as I was picking out clothes. I'm seriously considering buying a lunch today so I can take a 10-minute nap before I leave. I went to bed at about the same time Sunday night as last night...so what's up with being so sleepy today?
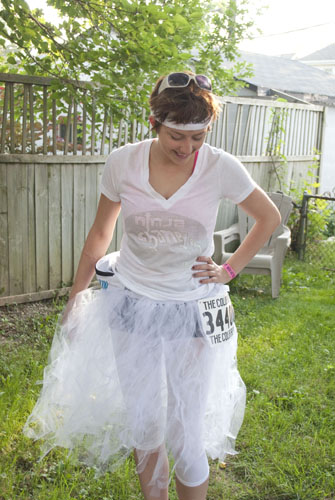
Anyway, I wore this outfit to a party last month. Like I said in my July clothes budget post, I was inspired to get a fedora. This is the first outfit I styled it with. The t-shirt is the one my team and I made for the Color Run last month. Yes, our team name was the Ninja Chameleons. We're awesome like that.
Ok, I think I'll nap for just a second now. Ugh. Is that coffee ready yet?
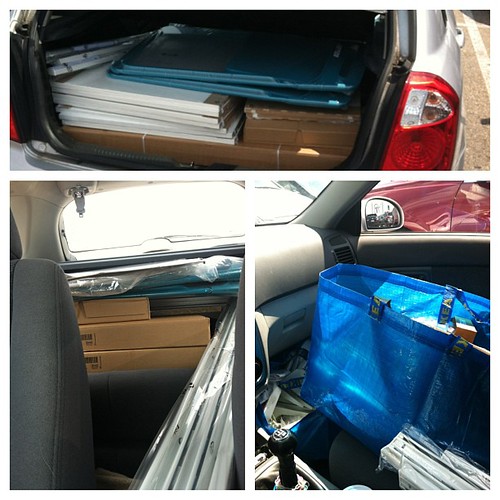
Morning, all! Well, it's been a heck of a weekend. Saturday Matt and I and a few awesome friends painted the entire house, minus a bathroom. That's two living rooms, the kitchen, two bedrooms and my closet. It was crazy but didn't take long at all thanks to many hands and this one awesome tool — I'll come back to that. We finished painting on Sunday, thanks to a color mix-up that delayed one wall, and moved a few boxes over to the new place. And yesterday, I went to Ikea to pick up a TON of furniture, as our new place is a bit bigger than the old and needed some major storage and lighting upgrades. You should of seen me...I was rolling through the warehouse pushing a flatbed and a regular cart at the same time. As my fellow Ikea-obsessed friend Emily put it: mad skills. I also Tetrised the hell out of my car to get everything to fit:
 I'm still working to get everything put together and am doing a few hacks to make some items look pretty sweet. With several pretty time-consuming projects going on, not to mention the official move itself and a bridal shower this weekend, posting will probably remain light this week. But in the meantime, here's a teaser for what's to come:
- A review of that really awesome painting tool that cut our painting time in half
I'm still working to get everything put together and am doing a few hacks to make some items look pretty sweet. With several pretty time-consuming projects going on, not to mention the official move itself and a bridal shower this weekend, posting will probably remain light this week. But in the meantime, here's a teaser for what's to come:
- A review of that really awesome painting tool that cut our painting time in half
- A cool storage hack using this little beauty, aka my former dresser.
- A transformative project for this dresser...or rather, two of them.
- A before-painting house tour. Please excuse the mess. And of course a post-move-in tour as well. Please excuse the still-unfinished-ness.
So yeah, that all should be pretty fun. Stay tuned!
Exactly zero of you have been clamoring for tips on making a tutu after my Color Run recap last week, but I already took the photos so I'm gonna post a tutorial anyway, mmkay? As the title of this post says, this is a completely no-sew project. It's super-easy, but a bit time-consuming I thought, so maybe have your favorite movie or a TV series you need to catch up on all queued up.
 Supplies:
- Tulle. I used about eight yards of tulle that was cut to 54 inches wide. Emily (in the photo above) used half that, but she cut her fabric in half to make a shorter tutu. So it depends on how long you want it to be, and how full. Whatever the width of your fabric is, your tutu will be about half as long.
- Waistband-quality elastic, a few inches longer than your waistline.
- Scissors
- Safety pins
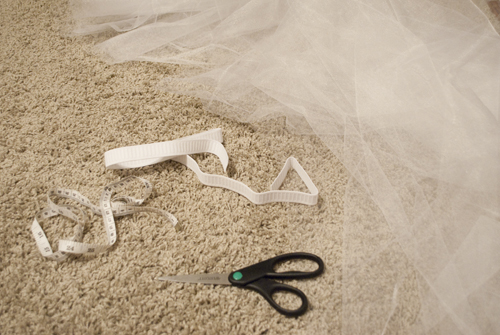 You'll notice there's a measuring tape in that photo. I thought I'd need it. I didn't. So let's all pretend it's not there, shall we?
First, you'll want to cut your tulle into strips, about an inch to two inches thick. At first, I folded my eight-yard cut of tulle in half width-wise (so I was cutting through 27 inches of material instead of 54). But you guys, tulle is hard to cut. Especially when you're trying to cut it while sitting on your grey-ish carpet. I may have cut up my carpet a little. (Okay, I did. Oh well.)
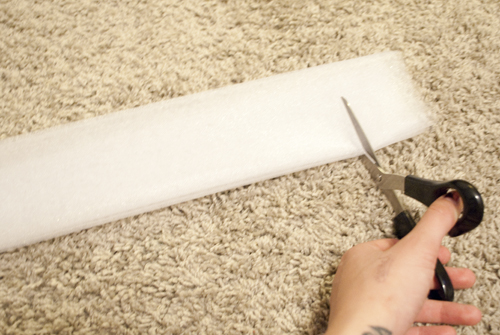
Then, a brilliant idea struck me: Keep folding the tulle! So I folded it in half, then in half again, and again until I had an almost-rolled tube-thingy of tulle. It was much thicker than the single-half-fold, so it was easier to cut through, and it was SO MUCH SHORTER, so it was faster to cut through as well. So I cut the eight yards into one-yard sections, then folded/rolled those sections and cut them into strips. Does that make sense? Here's a picture. In fact, here's two.
You'll notice there's a measuring tape in that photo. I thought I'd need it. I didn't. So let's all pretend it's not there, shall we?
First, you'll want to cut your tulle into strips, about an inch to two inches thick. At first, I folded my eight-yard cut of tulle in half width-wise (so I was cutting through 27 inches of material instead of 54). But you guys, tulle is hard to cut. Especially when you're trying to cut it while sitting on your grey-ish carpet. I may have cut up my carpet a little. (Okay, I did. Oh well.)
Then, a brilliant idea struck me: Keep folding the tulle! So I folded it in half, then in half again, and again until I had an almost-rolled tube-thingy of tulle. It was much thicker than the single-half-fold, so it was easier to cut through, and it was SO MUCH SHORTER, so it was faster to cut through as well. So I cut the eight yards into one-yard sections, then folded/rolled those sections and cut them into strips. Does that make sense? Here's a picture. In fact, here's two.
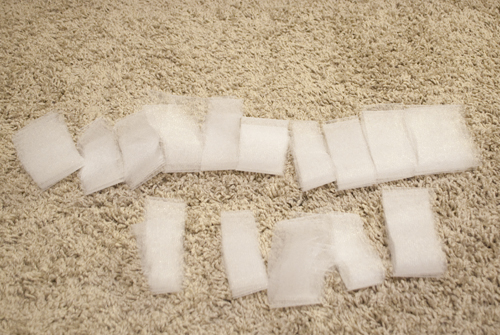 So all those little rolls are actually 54-inch strips. So. Then I just had to attach them to the elastic. (Forgive the weird half-full-to-empty-elastic switch. I made this thing in two sittings, and I may have been a tad wine-drunk on during one of them. Or both. Hey, it's an easy project...I had to keep myself entertained somehow.)
So anyway, to attach them to the elastic, you unroll the strip, then just fold it in half lengthwise. The closed end of the folded strip will go "upside-down" against the elastic, like so:
So all those little rolls are actually 54-inch strips. So. Then I just had to attach them to the elastic. (Forgive the weird half-full-to-empty-elastic switch. I made this thing in two sittings, and I may have been a tad wine-drunk on during one of them. Or both. Hey, it's an easy project...I had to keep myself entertained somehow.)
So anyway, to attach them to the elastic, you unroll the strip, then just fold it in half lengthwise. The closed end of the folded strip will go "upside-down" against the elastic, like so:
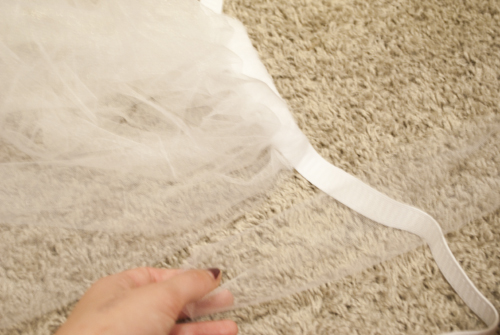 Then you bring the open ends of the strip down under the elastic and through the loop. It's kind of hard to see, but here's what it looks like:
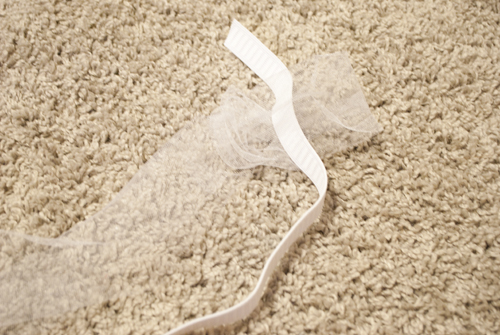 Then you pull it tight!
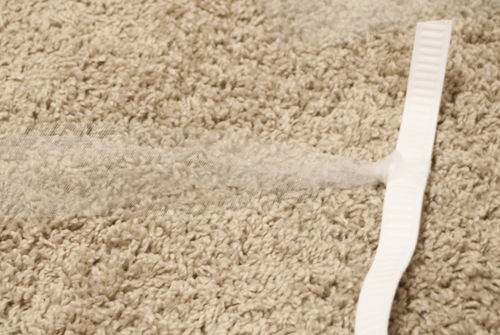 And then repeat approximately eight hundred quadrillion times until your wine is gone and your DVD ends and your eyes are crossed. In all, it took me about two or three hours, but if I had figured out the no-duh method for cutting the tulle faster, I might have cut that time in half. Once you have all your strips tied on, you just loop it around your waist and safety-pin the elastic to itself so it's like a belt. Voila!
 And if my rambling is completely throwing you off, here's the video I used as a guide. The girl's narration kind of bugs me, but she gets the point across. Probably more effectively than I do, haha.
So, have any of you ever made a tutu? Did you use this method, or something different?
And if my rambling is completely throwing you off, here's the video I used as a guide. The girl's narration kind of bugs me, but she gets the point across. Probably more effectively than I do, haha.
So, have any of you ever made a tutu? Did you use this method, or something different?
Because it's not Monday, and the pin that gave me inspiration was actually intentionally pinned...by me. That is, I had an idea for a project, and because I wanted to make it a Pinspiration Monday post, I found a picture of the project in mind, pinned it, and totally cheated. Then I went to the gym Monday, and we had a late dinner, and before I knew it, it was 9 pm and my brain just shut off for the day. So I'm a complete phony, but it's okay because I'm honest about it. Right?
Anyway. Today's Pinspiration is basically a knock-off of this Ikea wall art, which I discovered on a recent trip with my friends Emily and Stephanie. Emily actually bought the piece, and I really wanted to, but I didn't think purple butterflies would really jive with Matt. Aren't I the considerate girlfriend?
So instead of this super-girly motif, I decided to DIY a similar project. With leaves and green instead of butterflies and purple. So I stopped by Michael's and picked up a shadowbox frame, a piece of white card stock and a piece of green scrapbook paper. Total cost: about $15.
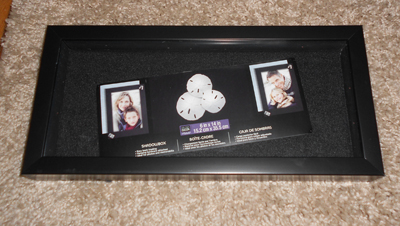 I then cut a piece of the green paper down to fit the back of the frame. It was actually a bit too short, but that's okay because I wanted a thicker border on the top and bottom. I also cut a piece of cardstock to the exact size of the backing. I pinned the green paper to the back using some included push pins.
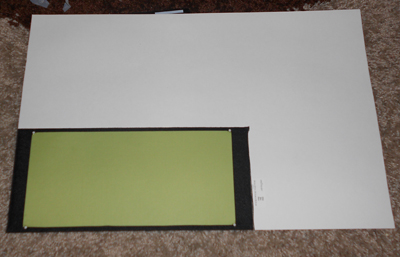
 Then I asked Matt to draw the vine/leaves. Because I am a terrible drawer. I think I frustrated him a bit, because I'm also a terrible explainer and we went through a few drafts before we got to a sketch I liked. It was actually a bit different from what I originally wanted, but I liked his version better! I had him draw the final sketch on the back side of the paper, so no pencil marks would show on the front.
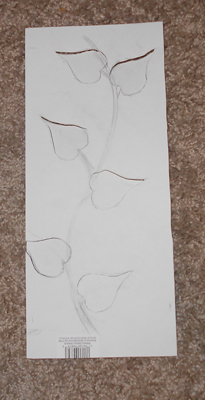 Then I used an Exacto knife to cut out only the leaves, making sure to keep them attached at the bottom, where they connect to the vine. Note: A sharp Exacto knife is preferable here, particularly with thick cardstock. My dull blade was kinda janky. And hard to work with. Note #2: Put a piece of cardboard under the cardstock as you're cutting. Your carpet/hardwood floor/table will thank you. A plastic cutting mat from a craft store is also useful.
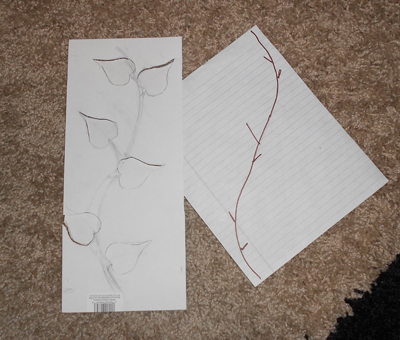 Next, I traced over the stem part of the sketch on a piece of notebook paper (on the right in the above image). I used a relatively thin paper and first just traced in pencil, then went over it in permanent marker. Then, I flipped both the cardstock and the notebook paper. That gave me a mirror image to help me draw the stem on the outward facing side of the card stock.
 Then, I folded the leaves upward and bent them a little to help them stick out from the surface of the paper.
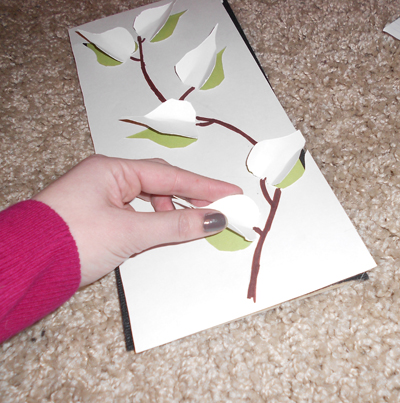 From there, I just had to drop the cardstock into the shadow box frame, with the leaves pointing out toward the glass...
 ...place the frame backing with the colored paper pinned to it over the cardstock, and replace the little hook things that keep the back of the frame in place.
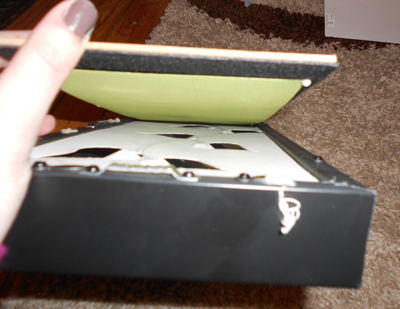 And here it is! I really love the final result, and I know this is corny, but I like that Matt and I kinda worked together to make it :)
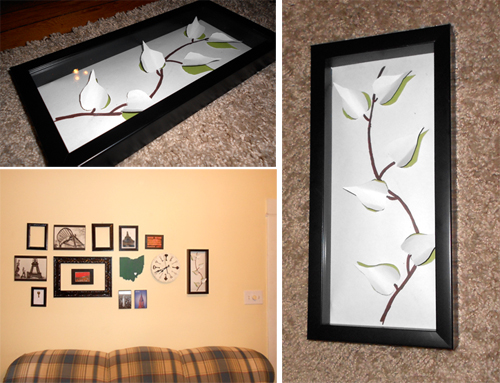 Now I'm just itching to finish this gallery wall. We had to shift our couch a little when we got our new entertainment center, making the whole arrangement off-center from the couch, which drives me crazy. I don't feel like removing all the frames, patching up the holes, repainting, and then rehanging all of those pictures. So the only solution is to make it bigger, obvs. This is gonna be fun :)