So last week, I stumbled upon Chairish, a "curator-approved online marketplace for vintage and used furniture"...right up my décor alley. I'll admit, most of the items on the site are pretty far out of my typical budget, but word on the street is that some items in the lower price range are available, too.
All of that to say, today I'm collaborating with Chairish in today's post to style a bar cart. In true indecisive fashion, I couldn't pick just one...so I styled two carts for two purposes! One is a fancypants cart for the wine aficionado, and the other is a more laid-back setup for a cocktail queen.
 1. This Mid-Century Brass Bar Cart is where it all begins!
2. I have a Houdini Corkscrew myself and it's like magic. Just squeeze the handles, dip the lever and your cork is out!
3. Wine classes come in all shapes and sizes, and it's not just red and white — but this Riedel Vivant Pino Noir Stemless Glass is a great basic option for your reds.
4. Similarly, white wine glasses vary in size. I don't like chardonnay, but I love the Riedel Vivant Chardonnay Stemless Glass. (Stemmed glasses are always an option too, but my clumsiness goes full-scale when I'm drinking wine so stemless for me, please!)
5. A good decanter, like this Ridel Vivant Balloon Decanter is a must for red wine lovers.
6. Sometimes, you just can't finish a whole bottle. Don't let it go to waste — pump out the extra air to save what's left with something like this OXO Vacuum Wine Preserver.
 1. This Hollywood Regency Brass Faux Bamboo Bar Cart is a little more casual than the one above.
2. What glasses you need really depends on what kind of cocktails you prefer. We're a bourbon household, with an occasional rum drink thrown in for funsies, but I've picked a few basics here.
a. A standard double rocks glass, like this Luigi Bormioli Classico Double Old Fashioned Glass, is my go-to. It's a great all-purpose glass for cocktails and drinks served straight-up or on the rocks.
b. I almost didn't include this, but as an avid mule fan I had to throw one in. This Moscow Mule Mug is great...though I prefer the Kentucky variation.
c. Once upon a time, I was a sucker for a margarita. (Who am I kidding, I still can be.) It'd taste fine in a double rocks glass, but it'd look so much better in this Glory Margarita Glass.
d. I've never liked martinis much, but if you do, you can't go wrong with this Viv Martini Glass. Also great for cosmos!
3. A stainless steel swizzle spoon isn't a necessity, per se, but it'll make you feel like a real bartender. This one has a fork on one end for spearing garnishes.
4. A muddler is a must for mojitos, not to mention a number of other tasty cocktails. I love having this OXO Muddler in my arsenal.
5. I never used a jigger in college, but then I grew up and realized that yes, proportions do matter and no, more liquor isn't always better. This OXO Double Jigger has a 1.5-ounce side and a one-ounce side, each with smaller incremental measures for more accurate pours.
6. Shaken, not stirred. (I couldn't resist!) No bar cart is complete without a cocktail shaker, like this Chefmate one.
7. An ice bucket doesn't just look nice; it also saves you from running between the bar and the freezer. Get one with a scoop or tongs, like this Threshold Hammered Metal Ice Bucket, so you don't have to stick your fingers in peoples' drinks.
8. A divided serving dish doesn't just look nice; it helps keep your lemons, limes, cherries and/or olives from mixing into a nasty flavor mélange. I've got one of these Easton 2-Part Stainless Steel Server on my shopping list now!
9. This cart lacks a drawer, so I picked out this Threshold Acacia Tray to keep all the bits and pieces corralled.
And there you have it: My bar cart basics, split up based on whether wine or liquor is your libation of choice. What do you think...anything I missed?
Disclaimer: This post does NOT contain affiliate links. I was not paid or perked for this post. Content created in collaboration with Chairish. Not sponsored by or affiliated with OXO, Chefmate, Riedel Vivant, Target, Crate + Barrel or Amazon.
Yes, a whole "house tour" post dedicated to my closet. I'm not even gonna apologize or make excuses, because this just might be my favorite room in the whole house. In fact, when Matt and I were initially touring the place with the landlord, I mentally signed the lease the second I laid eyes on this space. It's directly off the bathroom, and the previous tenant used it as random storage. What a waste. Never fear, I am using this room to its full potential. Here's what it looked like before:

 The first photo is looking into the room from the doorway, the second photo is at the back of the room looking toward the door.
Two trips to Ikea, one to Target, two to Bed, Bath & Beyond, a few coats of paint and several installs later, this is what it looked like:

 From basically the same angles, kind of. Excuse the purses on the floor, I still haven't fanangled my system for hanging those yet, but it's next on my list. The clothes bars/shelving just barely fit, and actually had to be modified a tad from my original plan because I apparently can't measure for crap. And that extension cord? Yeah, the only outlet in the room didn't work, so we were running that cord from the outlet by the bathroom sink, behind the tub and over to the power strip that the overhead and vanity lights were connected to. Not really safe, and rest assured that we have since remedied the solution. Sort of. Well, it's better than an extension cord next to two water sources.
I'll do a full-on closet organization post down the line, after I tweak a few more storage situations. But for now, here's a photo of Spazzy sniffing around my shoes. She loves my closet almost as much as I do.

If you read my last post, you'll know Matt and I are decorating the house in stages. (Okay, it's mostly me, but he helps with manly stuff like hanging shelves ginormous mirrors so I have to give him some credit.) Anyway, last post I showed you the downstairs. Today it's the upstairs, minus my closet, because that deserves an entire post of it's own, don't you think? I do.
This one has a lot of photos, so I'm just gonna delve right into them. When you go up our stairs, immediately on your right is the bathroom:


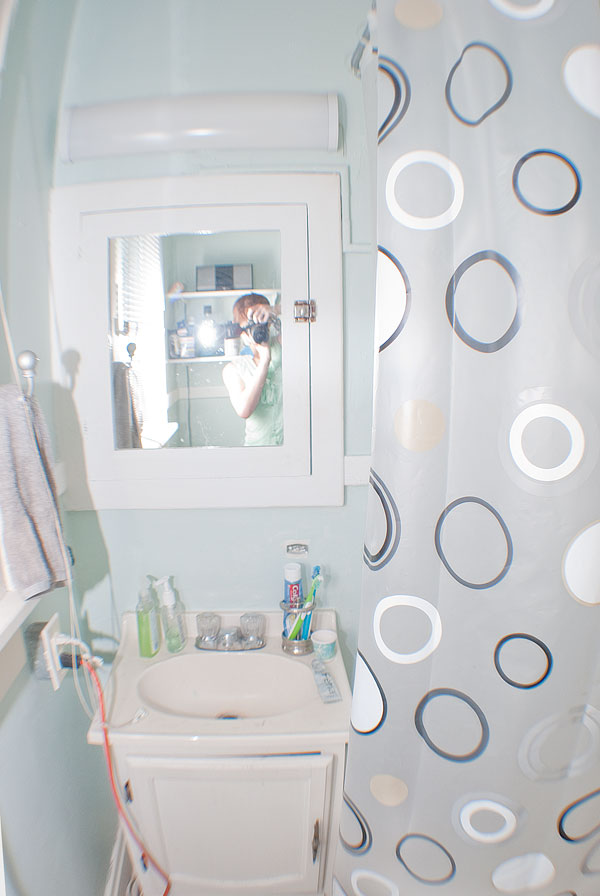 That little doorway next to the claw-foot tub (squee!!!) is my closet. More on that later. Anyway, when you come out of the bathroom, you're greeted by this hallway. It's the only thing in the house that hasn't changed since we moved in.
 The first room on your left is our spare room. It's mostly Matt's "jam room," if you will, but it's also where we house overnight guests. Our last place didn't really have the space for a "guest room," even a part-time one, so I'm pretty excited about this. I'm sure our sisters, brothers-in-law and various out-of-town guests are pretty stoked, too.


 Finally, at the end of the hall, is our room. A little smaller than our last bedroom, actually, but still pretty sizable. Matt's happy that his closet is in the same room he sleeps in again. (In the last place, I kicked him out of the bedroom closet and took it all over for myself. He got the smaller closet in the spare room, which then served as a tiny office/jam room.) No pics of his closet because...well, it's a boy closet. You get the idea. He doesn't even fill it. Blasphemy.
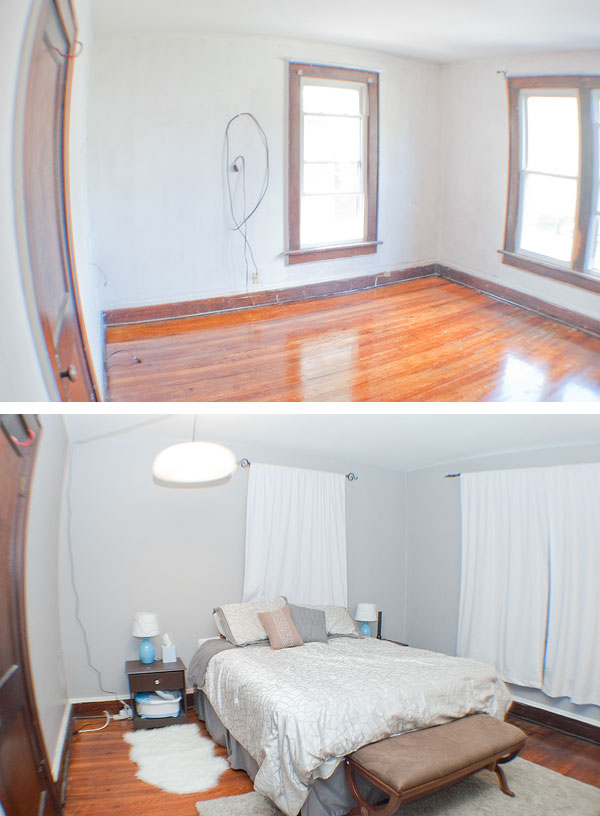

 So there you have it! I hope to have the closet photos ready for tomorrow, but we'll see. There are a lot of them. I really, really love my closet. #sorrynotsorry
And speaking of ridiculous use of hashtags, this is kind of hilarious. You're welcome.
Okay guys, bear with me on these photos. I shot them a while back and kept putting them off because editing these takes fo-freaking-eva, and I procrastinate a lot. Here we go.
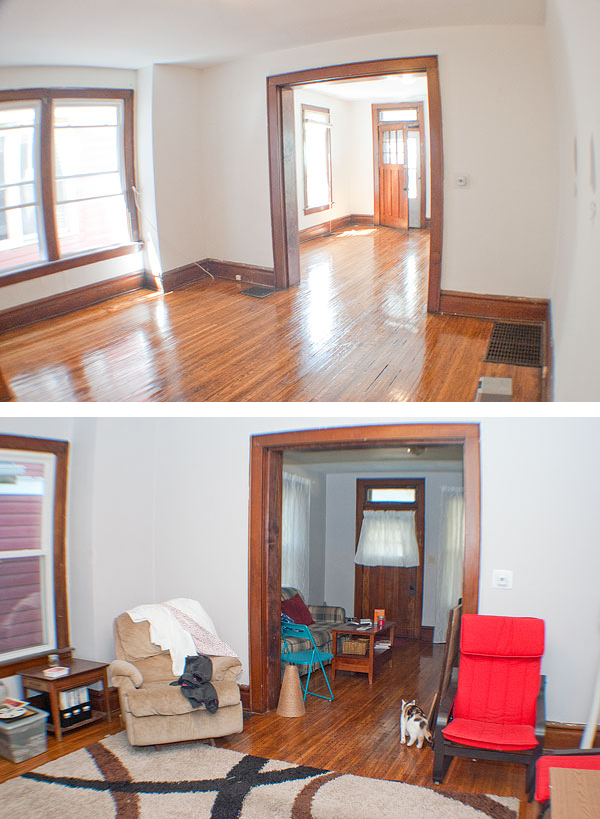
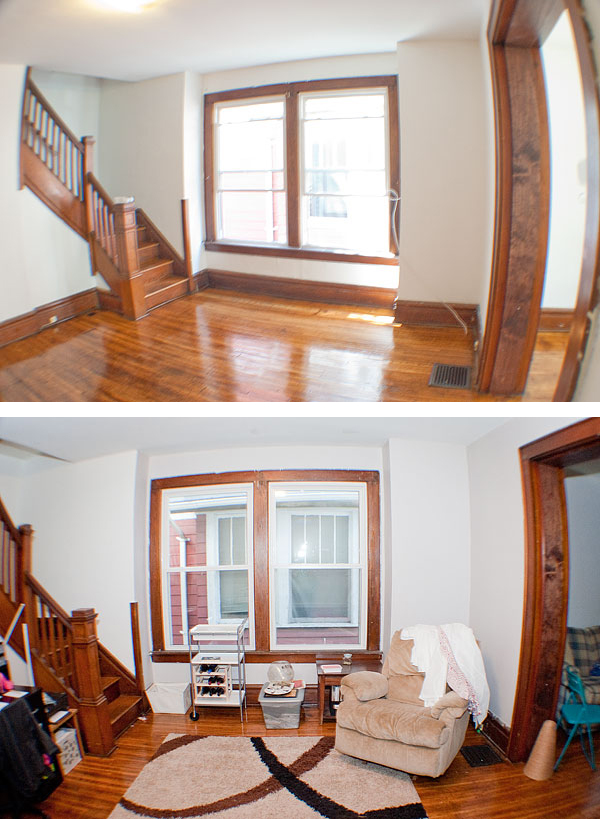
As I've been promising, here are the first round of before-and-"after" shots from the new place! There's not much to compare it to, because I didn't really post much about the last two apartments, but really they were crap so you're not missing out. Our new place is a duplex house, like our last one, but this time we are side-by-side with our house-mates instead of below them. So we have stairs! And lots of space! And it finally is starting to feel like a home and not a sardine can. So that's all awesome.
"Phase 1" of decorating this space basically consisted of painting, unpacking and solving some major storage issues. I managed to hang a few curtains, too...but not all of them. Phase 2 is underway (so there are changes since I took the "Phase 1 photos!) and consists of getting the art and remaining curtains hung and doing a few quick-hit upcycle DIY projects. Adjusting storage as needed. Maybe a new rug or something? And Phase 3 will be the final touches and upgrading our furniture. We're hoping to stay in this apartment until we're ready to actually buy a house, which will likely be quite a while. So we're really settling in!
I thought about doing a floor plan, Young House Love-style, but I fell asleep forgot. Since I'm only sharing the first floor, which isn't too complicated, I figured it can slide this time. So basically, when you first walk in the door, this is what you saw/see:
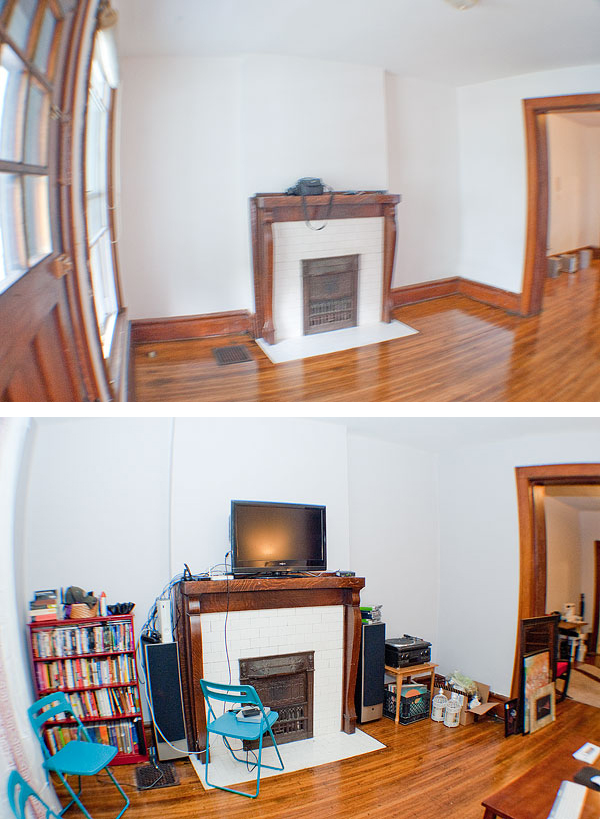
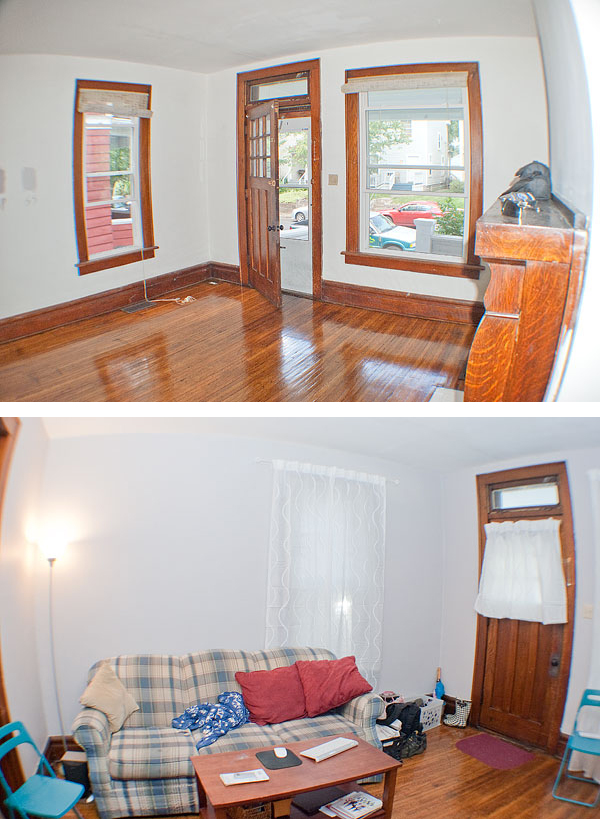 The couch is opposite the fireplace, so that door next to it is the front door. The doorway on the right side of the first photo leads into the second living area:
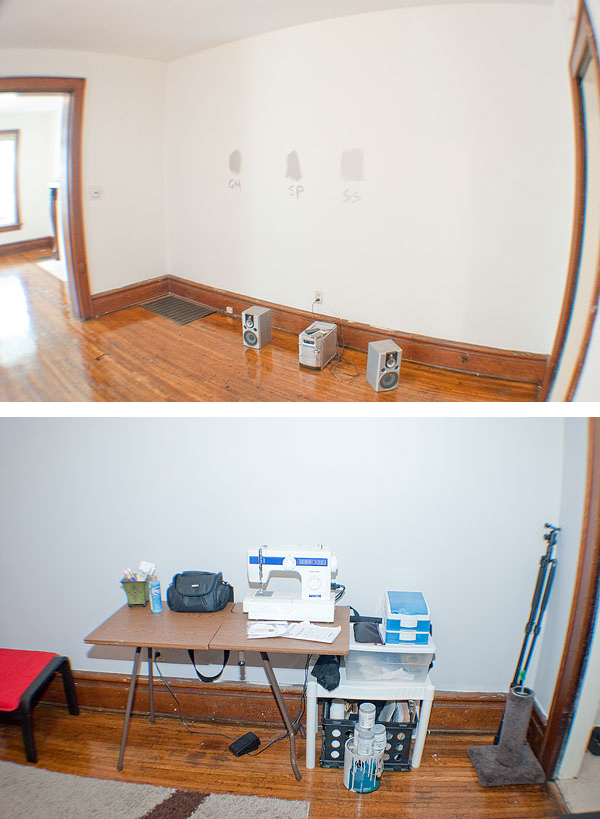
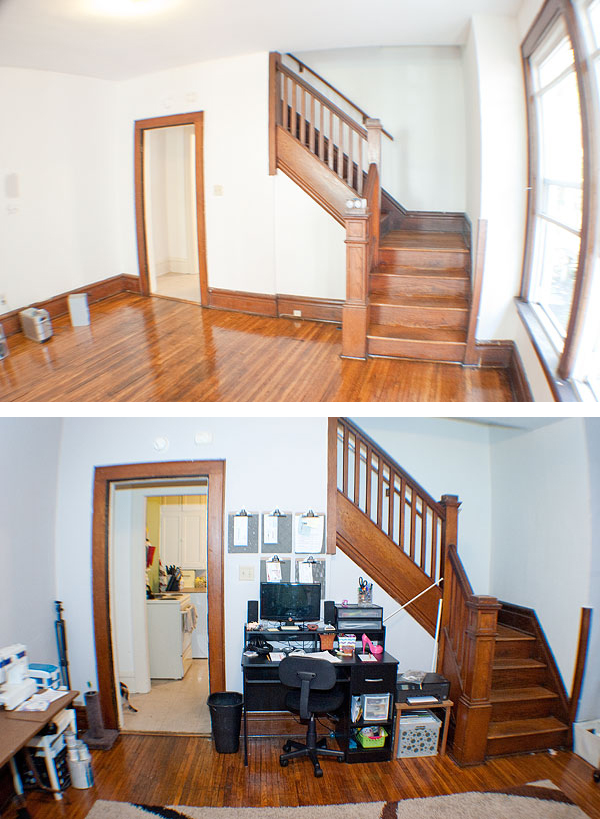 Yeah, we have a bar cart. We're ballers like that. Our collection is slowly growing :) To the left of the desk is a little hall-alcove-kinda-thing, which houses the door down to the basement. I didn't take a photo of the "before" of the basement door, but when I hung all our mops and brooms and other cleaning apparatuses on the back of the door, the screws stuck through. Solution: Hang art on them!
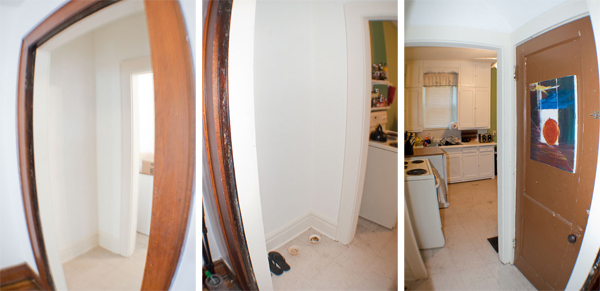 And through the alcove/hall thing is the kitchen! There's a back door that leads to the backyard, but I'm kind of intentionally avoiding outdoor photos of the house for safety reasons. (My outfit photos are taken in the backyard, which we share with our house-mates, or in the alley behind us. So that gives you a little bit of an idea of space, I guess.)
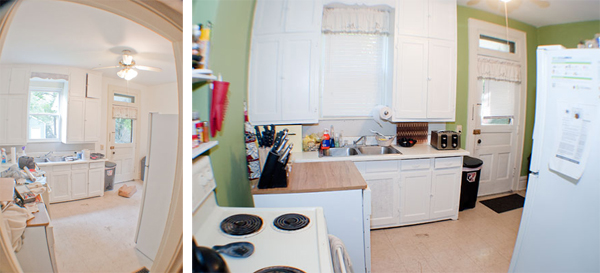
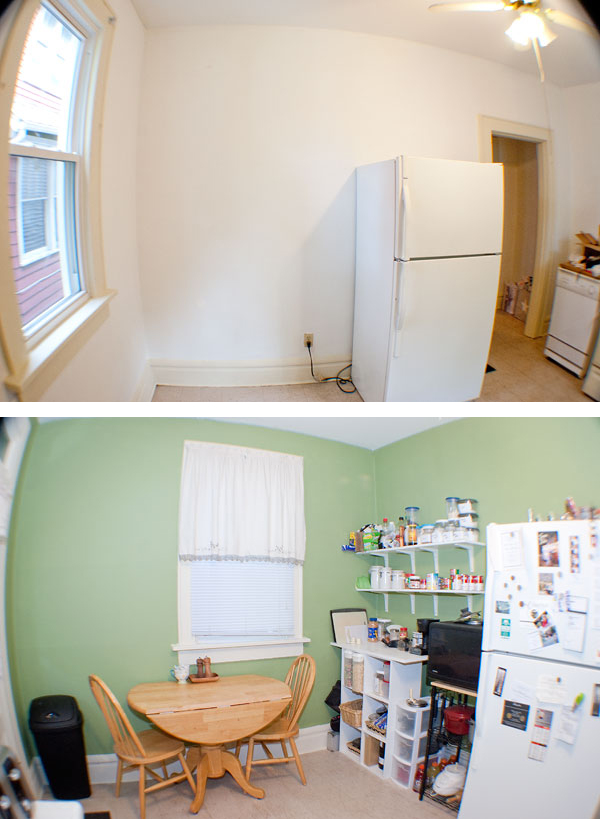
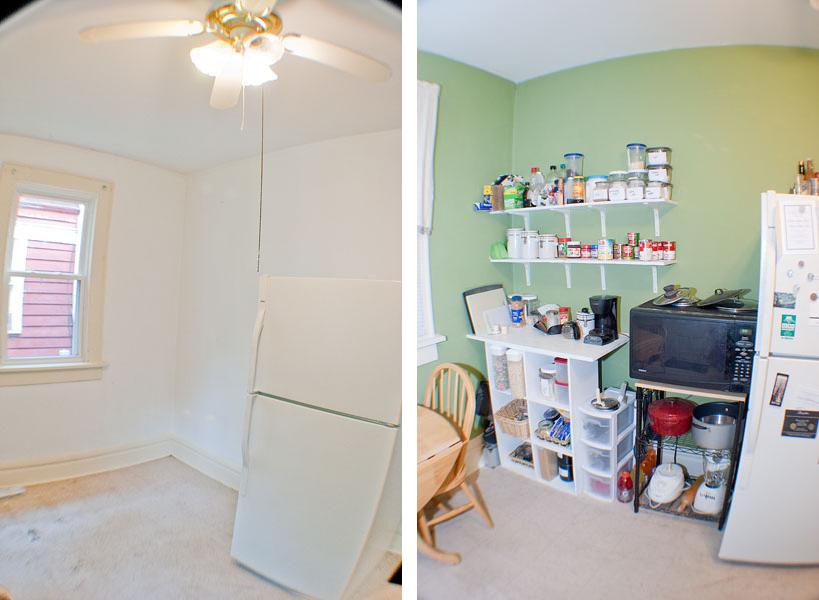
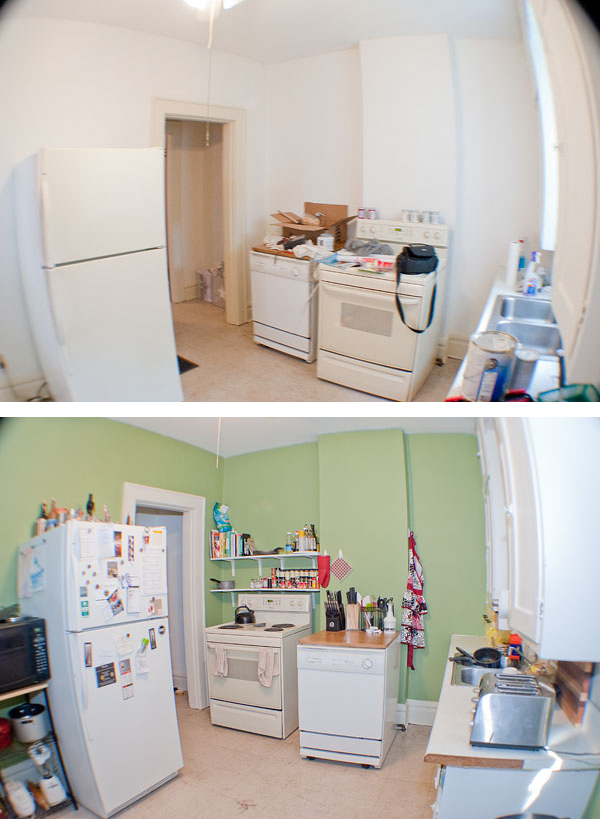 So there you have it! The first floor, before and after Phase 1. Upstairs will come soon, though I can't make any promises on when exactly. Same goes for a little "how I did it" post on that cubes-with-the-countertop thing in the kitchen, next to the fridge. I just need to get my ish together on both counts...
Okay first, a few disclaimers. Most importantly, I was not paid or compensated in any way for writing this post. I just used a product that I really, really liked and decided to recommend it. Because seriously y'all, this little buddy cut our edging time in half. In thirds! And secondly, I'm apparently the worst blogger ever because I didn't take any photos of us using this thing. None. We painted seven rooms and not once did I stop to say hey, this warrants a pic. Not even on my phone. In my defense, I really freaking hate painting so I was really just in the mindset of "let's get this over with already."
Because Matt and I were taking the time to paint pretty much the whole house before we moved in (two living rooms, the kitchen, two bedrooms, the bathroom and my closet), I thought I'd give a paint edger a whirl. Taping and edging a room with a brush takes foooooooooooooofreakingever and I hate, hate, hate it. So I decided to give the Shur-Line brand edger a try.
I wound up buying two Shur-Line edgers: This one from Amazon for just under $5, and this one from Lowe's for about $6. The Lowe's one had wheels and little "retractable guides" to cover them (more on that later); the Amazon one did not. We basically used the Amazon one once and tossed it. The Lowe's one was far superior, so that's the one I'll focus on from here on out. (I also bought a ton of these refill pad thingies from Amazon. They're about $2.50 for a two-pack, and they fit the Lowe's edger just fine. Matt and I were feeling both lazy and wasteful, so we just tossed them out as we went. I suppose you could wash them out, but it would take next to forever. I tried one, just for kicks and giggles. There were no giggles involved.)
 Anyway, getting an edger was pretty much the best decision I ever made in regards to painting. It was as easy as dip, scrape, swipe, swipe, repeat.
A lot of Amazon commenters complained that the paint went on too "goopy," so I made sure to use the following method: Lift the retractable guides (so important to remember, or you'll have a line of paint on your baseboard/ceiling). Dip the pad in paint, soaking thoroughly. Scrape off excess paint on the edge of your tray. Slowly and with steady-but-not-too-firm pressure, swipe the edger along your chosen edge. Go back over the extreme end of your edge (where it meets the still-white wall) with a light brushing motion, as the edger sometimes "beads" extra paint there. That's it! I could do the entire length of a 13-foot wall in under 90 seconds once I got my rhythm and pressure figured out. In some areas I pressed too hard, so I had to go back and do a second little coat. But with the right amount of pressure and the right amount of paint on the pad, this thing is a freaking godsend!
Of course, there are a few cons. The beading was an issue at first, and I may or may not have dripped paint onto the baseboard a few times before I got the hang of it. And our baseboard was really thin, so it took a bit of extra concentration not to slip down onto it. But the retractable guides and wheels were simply superb against the ceiling and the thicker window/door trim. Also, because of the way it's designed, corners are a challenge. Matt had to go back through with a brush and get the very innermost parts of the corners after I hit them. But still. We were able to finish each room in probably a third or even a quarter of the time it would have taken to tape and edge by hand. No lie.
What's your take on painting? Is it a chore that must be dealt with, like it is for me, or do you find it therapeutic and rewarding, like my friend Jen does? Have you ever used an edging tool, or do you prefer the tape-and-brush method?
Morning, all! Well, it's been a heck of a weekend. Saturday Matt and I and a few awesome friends painted the entire house, minus a bathroom. That's two living rooms, the kitchen, two bedrooms and my closet. It was crazy but didn't take long at all thanks to many hands and this one awesome tool — I'll come back to that. We finished painting on Sunday, thanks to a color mix-up that delayed one wall, and moved a few boxes over to the new place. And yesterday, I went to Ikea to pick up a TON of furniture, as our new place is a bit bigger than the old and needed some major storage and lighting upgrades. You should of seen me...I was rolling through the warehouse pushing a flatbed and a regular cart at the same time. As my fellow Ikea-obsessed friend Emily put it: mad skills. I also Tetrised the hell out of my car to get everything to fit:
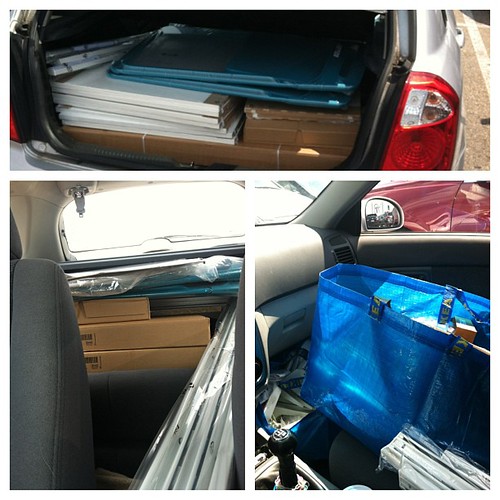 I'm still working to get everything put together and am doing a few hacks to make some items look pretty sweet. With several pretty time-consuming projects going on, not to mention the official move itself and a bridal shower this weekend, posting will probably remain light this week. But in the meantime, here's a teaser for what's to come:
- A review of that really awesome painting tool that cut our painting time in half
- A cool storage hack using this little beauty, aka my former dresser.
- A transformative project for this dresser...or rather, two of them.
- A before-painting house tour. Please excuse the mess. And of course a post-move-in tour as well. Please excuse the still-unfinished-ness.
So yeah, that all should be pretty fun. Stay tuned!
For many things, it would seem. Including my annual "cold that's so bad I'm pretty sure I'm going to keel over" illness extravaganza. I spent all day yesterday on the couch, and barely dragged my sorry butt through work today. But time and tide wait for no man, or something like that (feels like that cold medicine is kicking in...I'm loopy) so here are some pics of our Christmas tree this year.


 I wanted to get a real tree, but space is something of an issue, so I used our speaker as a kind of tree extender, complete with green garland and lights. And because there wasn't room for all of our (okay, my) Christmas ornaments, I used some to decorate beside the tree and on our mantle (which is crazy cluttered and therefore unphotographed). We have a lot of Ohio University ornaments. School pride! Go Bobcats!
In other news, it was really frustrating taking these photos until I discovered that I can actually adjust the ISO settings on my point-and-shoot. Score!
Oh, and those presents down there? Matt and I opened them already. I was really excited for him to open his gifts, so I insisted that we do it last week. I got him a really nice new tent and cufflinks shaped like the Starship Enterprise. He got me some gloves that have fingertips specially designed to work with touch screens, so I can text and stay warm :) And a bunch of Pampered Chef things I really wanted, AND an amazing pair of slippers that keep my feet toasty warm. (That's kind of a gift for him, too...I used to put my cold feet on his legs at night to warm them. But no longer!)
What about you guys? Any early present-openers out there?
I don't think I mentioned this on the blog yet, but Matt and I recently bought a turntable and a sound system from our friend Scott. (Thanks Scott!) The speakers are ginormous, and the addition of the turntable and amp meant that our entertainment system had outgrown our entertainment center, so we decided to rearrange the living room and get a new unit to house our electronics. So for this week's Pin-spiration, I really wanted to repurpose a dresser into a TV stand. I have a bunch of ideas pinned to my Pin-spiration pin board, but here's the general idea:
But I couldn't seem to find an appropriate dresser at thrift stores or garage sales around here. But then, in the midst of my search, I found this glorious entertainment center at a consignment shop. I'd peg it at easily $150+ retail, but this gently used beauty was on sale, half off, for just $18. It was unbelievable. I couldn't resist. (More on that in another post.)
So instead, I happened upon this little mini-project instead:
It was perfect; I am seriously short on fridge magnets (why does that feel like a weird thing to say?) and I happen to have a pretty nice little collection of foreign coins. The only ones I've collected my self are from Canada, as it were, but the rest came from family and friends who have traveled farther than I. I have a decent representation from both Europe and Asia, and a few from Central America. Best of all, I had some duplicates and some "unknowns"—mystery coins of dubious origin—so I used those to make about two dozen magnets.

 I started by heading to Lowe's and getting some small disc magnets. I bought 16, and later realized I already had seven at home, so I was good to go. I only took a photo of the first 16 coins, because I didn't realize I had more magnets until I was done with this batch. Womp womp.
 The original blogger used a glue called "E-6000," but I didn't feel like buying a super adhesive, as I tend to have issues with regular old super glue. (By issues, I mean I once super-glued a phone to the side of my face. I wish I were kidding.) Anyway, I decided to go for hot glue instead. Didn't work even a little bit. So super glue it was after all. Fun fact: American coins are not magnetic, but coins from some other countries are. (I'm looking at you, Canada.) I did not know this...and it was pretty interesting to figure that out while struggling with super glue. But I'm pleased to say I escaped without incident.
 They stand off the fridge a little higher than I would like, but overall I'm pretty dang satisfied with this one. It's a cute little quirk that makes our fridge fun :)
 Why yes, I do hang kid art on my fridge. My little sister drew these for me when I was in college and since graduating. She's six now, and it's kind of cute to see her evolving skill level :) ...Though I have to say, I'm pretty sure my mom colored the Sesame Street one at my sister's request. She likes to delegate, haha!
For this week's project, I decided to tackle something that I've been meaning to do for more than a year now. Looking back, I can't figure out why I put it off for so long...it was super easy, and I really love the look. So here's the pin that inspired me:
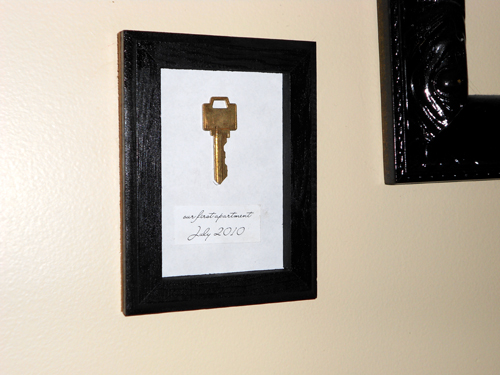
So I went to the thrift store to grab a cheap frame, which originally was unfinished wood. I had some leftover black spray paint, so I just hit it with a few quick coats. Then I hot-glued the key to a piece of paper, and printed off the date and description because my handwriting is terrible. And here's how it turned out!
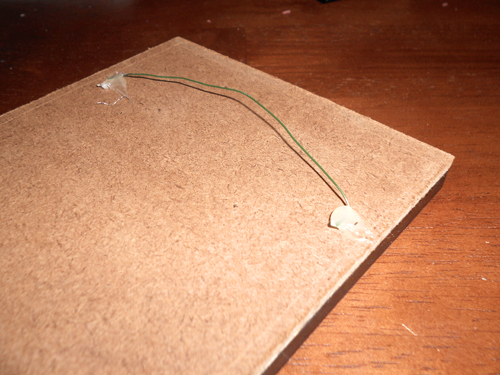
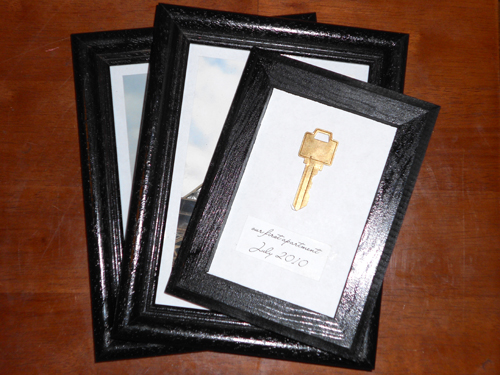 The frame didn't come with glass, or a proper back for that matter, so I had to get creative. The piece of paper that the key is glue to was just a tad smaller than the frame itself, so I just had to sandwich the paper between the frame and the piece of cardboard that came with the frame:
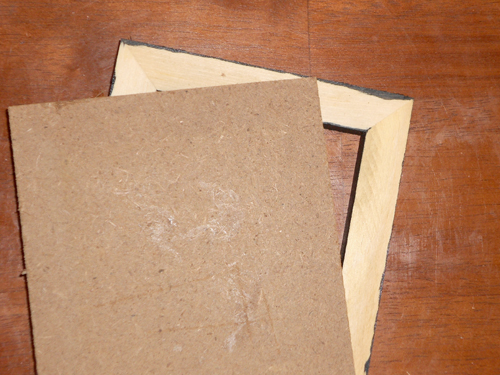 Then I just used a little wire left over from last week's project, and hot-glued it to the back of the cardboard/frame.
 The final product turned out great, and I really like the shadowbox-like quality of it not having a glass cover.
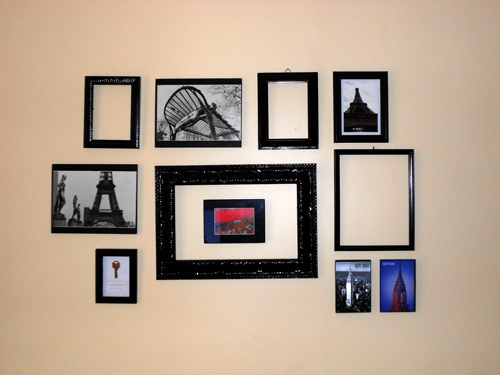
 It's now hanging, along with another new addition, among my living room gallery wall. The other new photo is the cool Eiffel Tower shot in the top right corner. My BFF Emily took that shot on her recent trip to Paris! It's a great shot; this image really doesn't do it justice. (The frames are mostly thrifted and spray-painted, and you can click here for info on the other art shown here.
 So, week two of Pin-spiration challenge is a success! Do you have any Pinterest-inspired projects you've been meaning to tackle lately?
Well, here are my first two actually-doing-the-things-I-pin-on-Pinterest projects! One was a satisfying success, but the other...well, let's just say there's a reason why sites like Pinterest Fail and (my personal favorite) Pintester.
So, without further ado, my epic Pinterest fail. Here's the Pin-spiration:
And here's my version:
 Ah, ombre nails. It looked so effortless and the final effect was just so stinkin' cool. So where did I go wrong? I think a little of the problem stemmed from my color choices. The original pin had two similar hues, while my opaque glittery silver didn't really mix well with the deep, deep purple. Also, another version of this pin seemed to indicate that you should wiggle the sponge up and down along the length of your nail to blend a little better. Maybe I'll try it again when I'm feeling up for a possible disappointment :P
Now, to end on a more pleasant note. My old method of jewelry storage wasn't exactly attractive, to say the least. See?
 Ick. So I decided to start my jewelry organization revamp with a few cute containers. I bought a couple small dishes from the thrift store (one of which I hit with a quick coat of white spray paint), and an adorable ceramic egg holder from the clearance room at Anthropologie :) For my earrings, I knew I had to get rid of that juvenile butterfly earring holder. That I've had since I was approximately 14. So here's my Pin-spiration for that:
My end result turned out pretty satisfactorily. I used some green floral wire from Lowe's, as I couldn't find a thin enough metal wire like what's used in the picture. After I hot-glued it to the frame, I spray-painted it. For the frame itself, I snagged this $3 plastic frame from Target. I just tossed the glass pane and the backing.
 If I could redo it, I'd get a thicker frame so it could stand on its own, instead of having to be propped up against or hung on a wall. And for a little tangent, here's the overall look of that jewelry area so far:
 I'm really loving this new look, and I think the white items play really nicely off of the cherry-ish stain of my jewelry box, which was given to me as a gift. I'm thinking about modge-podging the surface of my dresser (not sure what color/pattern yet), because the stain doesn't really make the jewelry box very well. I have a few ideas for how I might do the necklaces and bracelets, but they're untouched as of yet.
Alright! So project numbers 1 and 2 of my self-imposed Pinterest project-tackling challenge are complete. And I already have project number 3 picked out! Here's hoping I can actually stick to this challenge, haha :)